

We may earn a commission when you buy through links on this page, at no extra cost to you. Learn more.
To understand how to build a wine wall, start by measuring the available space, selecting a suitable racking system, reinforcing the mounting surface, and arranging bottles for secure, accessible storage. A successful wine wall combines practical storage capacity with an attractive display that complements the room. If you plan to refrigerate the collection, you also need appropriate insulation, moisture protection, sealed openings, and correctly sized cooling equipment. The construction method depends on whether you want an open decorative display or a temperature-controlled glass-enclosed wine wall.
A wine wall can transform an unused dining room partition, basement wall, kitchen feature, or dedicated storage area into an organized home wine collection. Unlike a freestanding cabinet, this arrangement uses vertical space and can become a prominent architectural feature. However, building one involves more than attaching bottle holders to drywall. Weight distribution, bottle dimensions, wall construction, humidity, lighting, and future collection growth deserve attention before installation begins.
1. Plan the Wine Wall Location, Capacity, and Design
The first step is deciding where the wine wall will go and how many bottles it should accommodate. A carefully measured layout helps prevent overcrowding, simplifies installation, and determines whether the project needs ordinary wall-mounted racks or a fully enclosed wine storage system.
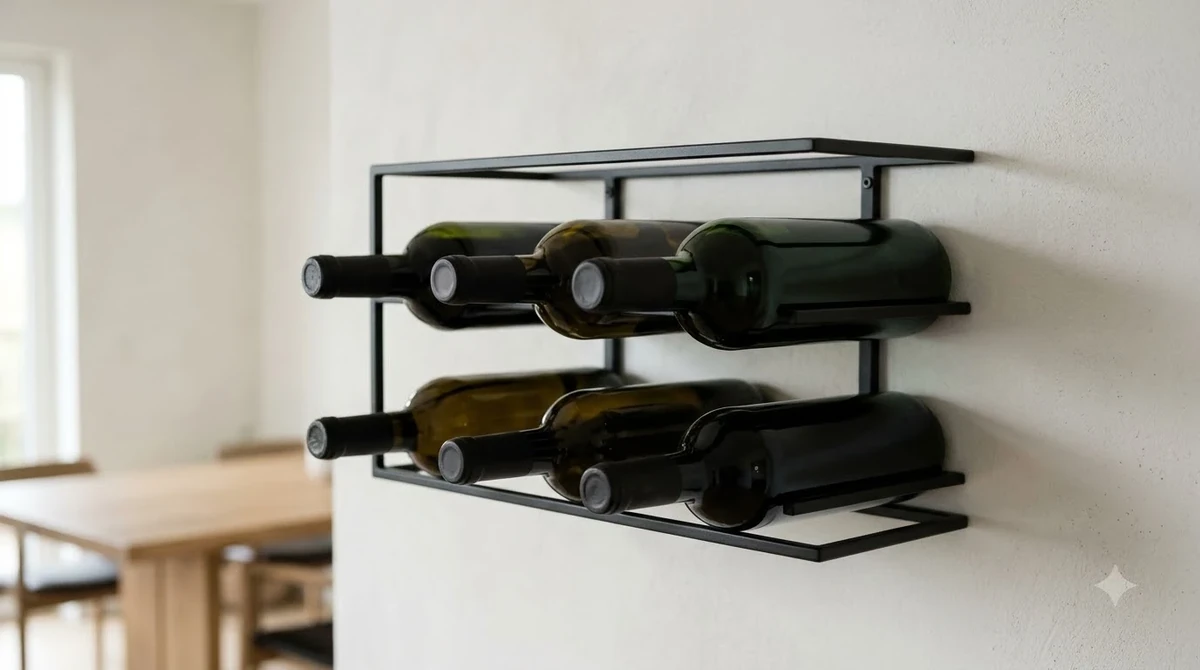
Start by identifying the wall’s available width, height, and usable depth. Measure from the finished floor to the ceiling, accounting for baseboards, door frames, nearby cabinets, electrical outlets, and light switches. Record the dimensions in inches and sketch the proposed arrangement. For example, a wall measuring 96 inches wide and 96 inches high provides 64 square feet of gross display area before accounting for borders, access space, and structural obstructions.
Next, estimate the number of bottles you expect to store. A small decorative installation might accommodate 30 to 60 bottles, while a dedicated collection wall could hold 100 to 200 bottles or more. These are illustrative planning capacities rather than guaranteed rack specifications. Actual capacity depends on bottle dimensions, rack spacing, and the amount of wall space reserved for framing and access.
Avoid designing exclusively around your current collection. Leave room for additional bottles, larger formats, and different bottle shapes, particularly if you regularly purchase Champagne, Burgundy, or sparkling wines. Standard 750-milliliter bottles are a useful starting point, but a mixed collection requires more flexible dimensions.
Consider how the wine wall will relate to the rest of the room. A kitchen display might benefit from narrow horizontal racks that keep bottles accessible. A dining room feature could use symmetrical rows, contrasting materials, or label-forward storage. A basement installation might prioritize maximum capacity and practical organization over decorative finishes.
Choose a wine wall style
Several common designs suit residential wine storage:
- Horizontal bottle racks: Hold bottles sideways and create orderly rows across the wall.
- Label-forward metal racks: Display wine labels toward the room, making identification easier.
- Individual bottle pegs: Support individual bottles and create a minimalist suspended appearance.
- Wooden cubbies: Create traditional compartments suitable for organizing different wines and bottle formats.
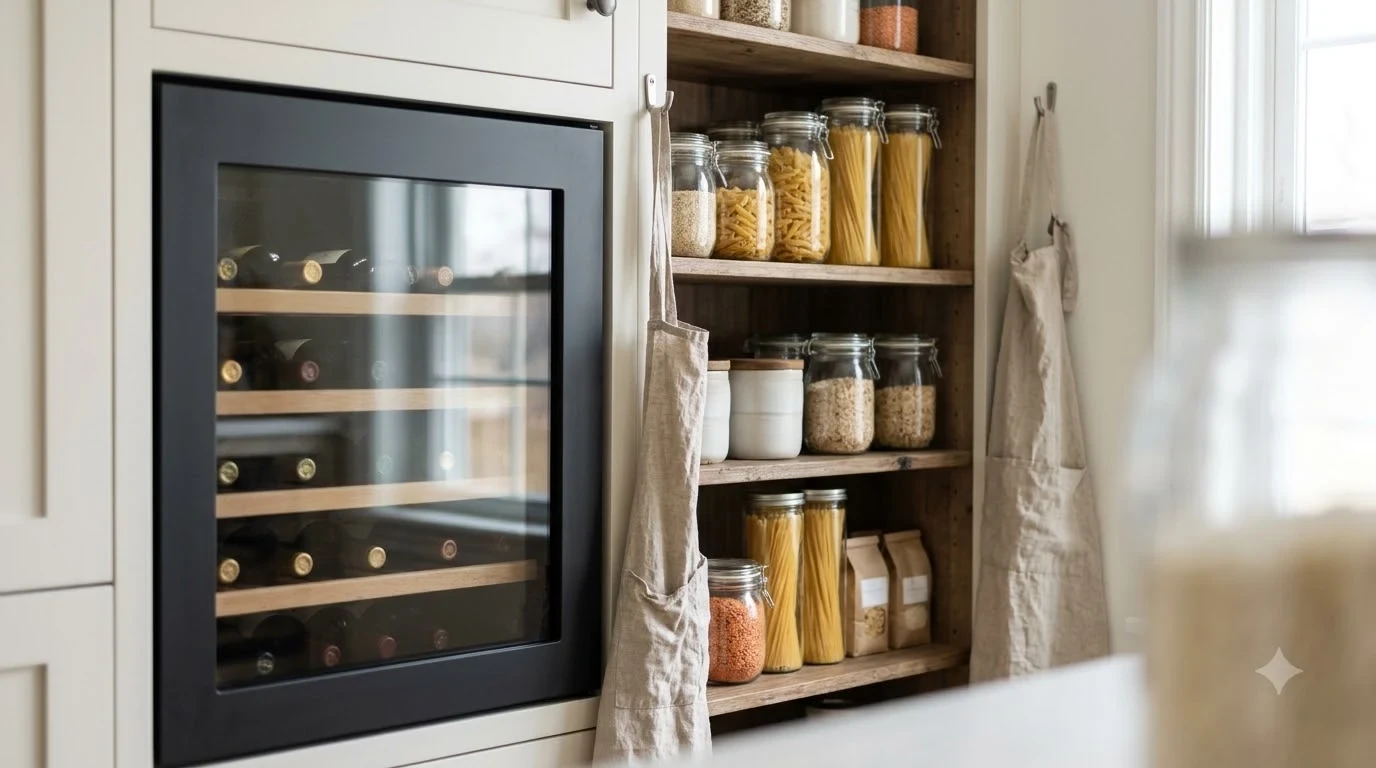
- Glass-enclosed displays: Combine decorative presentation with a controlled storage environment when designed as a properly insulated enclosure.
Think about accessibility before committing to a layout. Bottles used frequently should be positioned between comfortable waist and shoulder heights. Reserve higher shelves for bottles accessed less often, and avoid placing heavy bottles where they could be difficult to retrieve safely. If the wall is part of a busy entertaining area, make sure people can reach bottles without blocking walkways or disturbing nearby furniture.
2. Choose the Right Wall, Materials, and Structural Support
The mounting surface determines how safely a wine wall can carry its collection. Wine bottles are heavy, and a full installation creates a substantial permanent load, so the wall structure and fastening system must be selected before purchasing decorative racks.
Begin by identifying what is behind the finished wall. Wood studs, concrete, brick, and metal framing require different mounting hardware. A stud finder can help locate wood framing, but electrical wiring and plumbing should also be identified before drilling. If the wall is load-bearing or its construction is uncertain, consult a qualified contractor before making structural changes.
For a conventional wood-framed wall, attach rack supports to structural studs rather than relying on ordinary drywall anchors. A typical residential stud layout uses 16-inch spacing, although some buildings use different arrangements. Confirm the actual spacing before planning rack positions. When intended rack holes do not align with studs, properly installed structural backing or blocking may be needed behind the finished wall.
Select materials for the environment
Wood, metal, and glass are popular choices, but each serves a different purpose. Hardwood racks made from suitable, properly finished lumber offer a traditional appearance. Metal systems provide a slim profile and can make individual bottle positions easier to adjust. Glass creates an open visual effect, although glass components used in a refrigerated enclosure require appropriate specifications and professional installation.
Choose finishes that can withstand the expected room conditions. A decorative open rack in a climate-controlled living room has different requirements from a wine wall inside a humid refrigerated cellar. Avoid untreated materials that may absorb moisture, warp, or deteriorate. For a temperature-controlled project, moisture-resistant wall finishes and compatible sealants are important parts of the overall construction.
Fasteners should match the wall material and the rack manufacturer’s specifications. Concrete and masonry installations generally require suitable masonry anchors, while wood framing requires structural screws or other approved fastening systems. Do not assume that a large number of ordinary drywall anchors automatically creates a safe installation.
Tip: Before installing any racks, calculate the combined weight of the bottles, rack components, and decorative materials. Have the mounting system and wall structure checked against that load rather than relying on the appearance or advertised capacity of individual fasteners.
For a handmade alternative, consider the construction principles in this article about how to build a wine rack from pallets. Reclaimed wood can work for a decorative project, but inspect it carefully for damage, contamination, splinters, and unsuitable treatments before bringing it into a wine storage area.
3. Prepare the Wall and Build the Supporting Structure
Once the design and materials are established, prepare the mounting surface before installing the visible racks. This stage is especially important for larger wine walls because structural reinforcement is much easier to complete before decorative panels and finished surfaces cover the framing.
For a conventional open wine wall, remove damaged wall coverings where necessary and inspect the exposed surface. Confirm the position of studs, identify electrical or plumbing obstructions, and mark the intended rack layout. If additional backing is required, install appropriate blocking between structural members or use another engineered support method approved for the wall construction.
For a full-height display, consider whether the racks should be mounted directly to the wall or attached to a separate supporting panel. A plywood backing panel can make positioning modular racks easier and provide a continuous mounting surface when properly secured to the underlying structure. The panel thickness, grade, support spacing, and fasteners should be selected according to the system’s actual loads.
Build a refrigerated enclosure differently
A refrigerated wine wall is not simply an open rack with a cooling appliance placed nearby. It needs a complete insulated enclosure that controls heat transfer and moisture movement. The walls, ceiling, floor, glass, and door must work together to maintain the intended temperature and humidity.
Wine cellar construction commonly uses 2-by-4 or 2-by-6 framing, depending on available space and insulation requirements. A 2-by-6 wall provides a deeper cavity for insulation, which can be helpful where the cellar faces an unconditioned garage, attic, or exterior environment. Ceiling framing must also accommodate the specified insulation while meeting applicable building requirements.
Insulation specifications vary by equipment manufacturer and building assembly. For example, WineCellars.com’s wine cellar construction guide recommends planning insulation, sealing, doors, glass, and cooling as parts of one integrated system. The required insulation value should be established through the cooling manufacturer’s specifications and an appropriate heat-load assessment.
Common insulation choices include fiberglass batts, rigid foam boards, and closed-cell spray foam. Fiberglass and rigid foam generally need a separate, continuous vapor-control layer. Properly installed closed-cell spray foam can provide both insulation and vapor control, but application thickness and compatibility with the building assembly must be verified.
Install vapor protection before finishing
Moisture control is critical because a refrigerated cellar is colder than the surrounding home. Warm, humid air moving through gaps in the enclosure can produce condensation inside walls, around equipment, and near the door. Over time, trapped moisture can damage framing, finishes, and stored materials.
A commonly specified vapor barrier is 6-mil polyethylene sheeting. For conventional insulated assemblies, the barrier is generally installed on the warm side of the insulation. Its precise position must be coordinated with local climate conditions and the complete wall assembly, particularly in humid climates where incorrect vapor control can trap moisture.
Overlap polyethylene seams by at least 6 inches when following IWA installation guidance, and seal joints, corners, electrical penetrations, and pipe openings with compatible materials. The goal is a continuous enclosure rather than a collection of loosely connected plastic sheets. Closed-cell foam assemblies need their own inspection to verify continuity and adequate coverage.
Before covering the framing, arrange blocking for racks, electrical connections, lighting, cooling lines, drains, and any ventilation paths. This prevents unnecessary cutting into the finished wall later. For a substantial project, compare the requirements with those involved in how much does it cost to build a wine cellar, since a refrigerated wine wall can involve many of the same construction systems.
4. Select and Install the Wine Racking System
The racking system determines how the finished wine wall looks, how many bottles it stores, and how easily individual wines can be accessed. Choose a system that fits the available dimensions, accommodates your bottle collection, and has a mounting method compatible with the prepared wall.
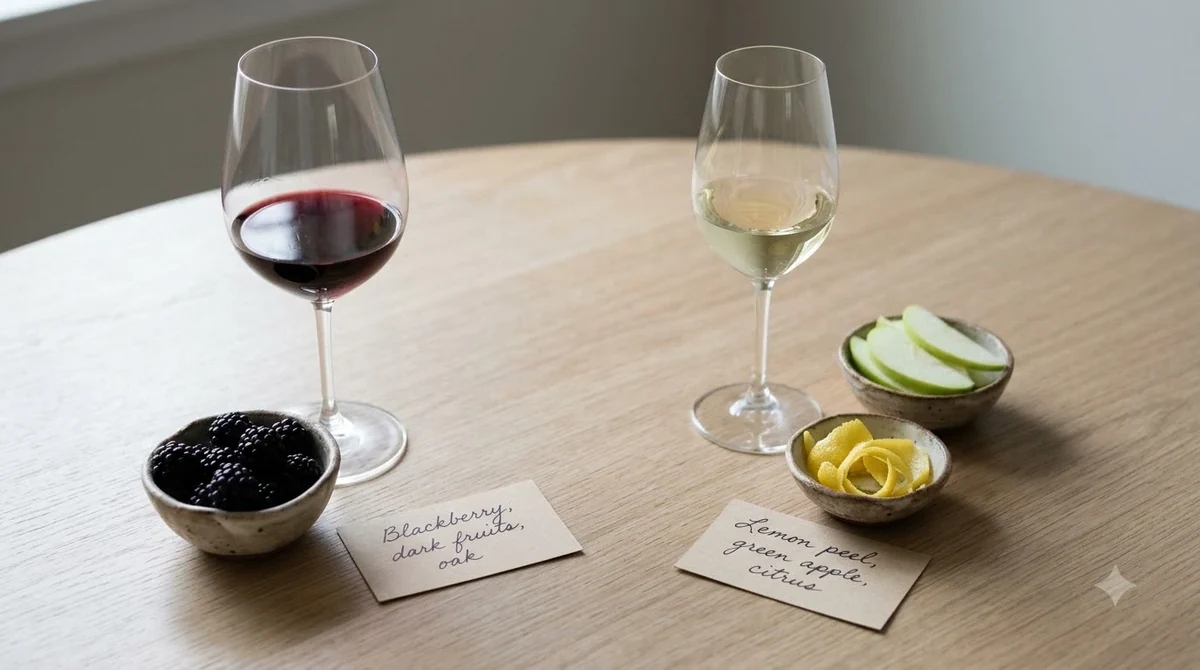
Horizontal racks are a practical starting point for traditional bottle storage. They position standard wine bottles on their sides and create orderly rows. Label-forward racks instead orient bottles so their labels face outward, making it easier to identify individual selections without removing them. Individual metal pegs offer another option when you want the bottles to appear suspended against the wall.
Measure bottle spacing carefully
Do not design every opening around a single assumed bottle diameter. Standard 750-milliliter bottles vary by wine style and producer. Burgundy-shaped bottles, broad sparkling bottles, and some premium bottles can require more clearance than a narrow Bordeaux-shaped bottle.
Measure representative bottles from your own collection, including their widest points and overall lengths. For a mixed collection, include Champagne and other sparkling bottles in the measurements. If you intend to store magnums, allow separate positions because their dimensions and weight differ considerably from standard bottles.
Spacing should also account for the rack’s construction. Some systems support the bottle at two points, while others use individual cradles or pegs. Follow the manufacturer’s specified clearances rather than improvising distances that might compromise support or access.
Install the racks in a controlled sequence
- Mark the finished rack positions using a level and measuring tape.
- Confirm that each mounting point aligns with the planned structural support.
- Check the wall for hidden wiring, plumbing, and other obstructions before drilling.
- Install the specified brackets, backing panels, or structural fasteners.
- Attach the rack sections in the manufacturer’s recommended sequence.
- Check horizontal alignment, bottle clearance, and overall stability.
- Test the completed system according to its rated capacity before loading the collection.
For larger installations, work from the bottom upward when the rack design and manufacturer’s instructions permit it. This can simplify alignment and help maintain consistent spacing across multiple sections. However, the actual installation sequence should follow the specific system’s engineering requirements.
Pay particular attention to the lowest and highest rows. Bottles positioned close to the floor can be exposed to accidental impacts, while bottles near the ceiling may be difficult to retrieve. Leave enough clearance for cleaning and inspection, and avoid placing racks where a door, cabinet, or nearby fixture could strike the bottles.
Organize bottles for practical access
Once the racks are installed, group wines in a way that makes sense for the collection. You might organize by grape variety, region, producer, drinking window, or occasion. For example, place everyday Sauvignon Blanc and Pinot Grigio together, while keeping Cabernet Sauvignon, Syrah, and Bordeaux blends in a separate section.
Label-forward systems make organization particularly convenient because the bottle identity remains visible. Traditional racks can benefit from small shelf labels or a separate inventory. Reserve a few flexible positions for new purchases, seasonal selections, and larger formats instead of filling every available space immediately.
5. Add Glass, Doors, Lighting, and Decorative Finishes
The finishing stage turns the installed storage system into a complete design feature. Material choices should complement the room while remaining compatible with the temperature, humidity, and maintenance requirements of the wine wall.
For an open display, consider a painted accent wall, sealed wood paneling, stone, or a neutral architectural finish. Dark backgrounds can make bottle labels and glass stand out, while natural wood creates a warmer traditional appearance. Keep the finish consistent with nearby flooring, furniture, and cabinetry so the wine wall feels integrated rather than added as an afterthought.
For a glass-enclosed wine wall, the glazing specification becomes especially important. Ordinary interior glass partitions are not automatically suitable for refrigerated storage. Single-pane glass transfers heat more readily than insulated double-pane glass and can create condensation when exposed to significant temperature differences.
Specify insulated glass, appropriate frames, and sealed perimeters as part of the complete enclosure. Large glass surfaces can also increase the cooling load, especially when exposed to direct sunlight. Include the dimensions, glass construction, frame details, and sun exposure in the equipment calculations.
Choose a properly sealed door
A refrigerated wine wall needs a door that closes tightly. An exterior-grade insulated door with continuous weatherstripping and a suitable threshold can help prevent warm, humid air from entering the cellar. Glass doors should have appropriate insulation and perimeter seals designed for the intended conditions.
Inspect the door opening before installation. Check that the frame is square, the threshold is level, and the door closes without gaps. A poorly sealed door can make a cooling system run continuously, increase condensation problems, and interfere with stable storage conditions.
Use low-heat lighting
Lighting should make the bottles visible without exposing the collection to unnecessary heat or ultraviolet radiation. LED fixtures are a practical choice because they produce relatively little heat compared with many traditional lighting options.
Consider concealed LED strips along rack edges, small surface-mounted fixtures, or carefully positioned display lighting. Avoid directing strong light continuously toward the bottles. Timers, dimmers, and occupancy sensors can help limit operating time.
Recessed lighting in a refrigerated enclosure needs additional care because every opening can interrupt insulation and vapor protection. Use fixtures suitable for the installation location, and seal penetrations properly. Surface-mounted lighting is often simpler because it reduces the number of openings through the enclosure.
For flooring, choose materials that tolerate moisture and are easy to clean. Tile, stone, and sealed concrete are common choices for cellar environments. Carpet and other absorbent materials are less suitable because they can retain moisture. Allow finishes, adhesives, paint, and sealants to cure completely before introducing bottles.
6. Install Cooling and Maintain Proper Wine Storage Conditions
A wine wall intended for long-term storage needs a stable environment rather than ordinary room air conditioning. A typical long-term storage target is approximately 55°F, with relative humidity around 50% to 70%. The correct equipment and installation method depend on the enclosure’s construction and surrounding conditions.
First determine whether the wine wall actually needs mechanical cooling. An open display in a consistently cool, dark, climate-controlled room may work for wines intended for relatively short-term storage. However, an attractive open rack in a warm kitchen or sunlit living room should not be treated as a temperature-controlled cellar.
Measure the temperature in the proposed location over time. Consider seasonal changes, direct sunlight, nearby ovens, heating equipment, exterior walls, and the temperature of adjoining spaces. A location that remains relatively cool during one season may become unsuitable during another.
Choose the cooling approach
Three common approaches are available for refrigerated wine spaces:
- Through-wall systems: Transfer heat through an adjoining wall and can suit smaller enclosures when there is adequate space for heat discharge.
- Split systems: Separate the evaporator and condenser, allowing the heat-producing condenser to be positioned elsewhere.
- Ducted systems: Move conditioned air through ducts, allowing the primary equipment to remain outside the visible wine display.
Each approach has different installation, maintenance, noise, electrical, and ventilation requirements. The equipment must be sized according to the enclosure’s complete heat load, not simply the number of bottles or the floor area. Wall insulation, ceiling construction, glass surfaces, door openings, lighting, surrounding temperatures, and air leakage all influence the calculation.
Do not choose a cooling unit based solely on a generic room-size chart. A glass-heavy wine wall can have a substantially different heat load from a similarly sized insulated room with solid walls. A qualified wine-cellar refrigeration specialist can calculate the required capacity and confirm that the equipment is compatible with the proposed installation.
Also consider equipment airflow requirements. Cooling units need adequate space for air intake and heat discharge, and their installation instructions specify the required clearances. Do not conceal a unit inside a cabinet or tight enclosure unless its manufacturer specifically approves that configuration.
Understand the storage numbers
The following figures provide useful planning references for a residential wine wall. They are typical targets, not substitutes for the manufacturer’s equipment requirements or a professional assessment of the room.
| Storage consideration | Typical figure | Purpose |
|---|---|---|
| Long-term wine temperature | 55°F | Stable storage and aging conditions |
| Acceptable cellar humidity | 50%–70% | Balanced moisture conditions |
| Interior wall insulation | R-13 to R-19 | Limits heat transfer |
| Ceiling insulation | R-30 | Reduces heat entering from above |
| Exterior wall insulation | R-19 to R-30 | Provides additional thermal protection |
| Vapor barrier overlap | 6 inches minimum | Helps create continuous moisture protection |
| Standard bottle capacity | 750 ml | Common bottle format for rack planning |
Temperature consistency matters more than trying to create an extremely cold display. Repeated temperature fluctuations can be more problematic than maintaining a stable, moderately cool environment. Humidity also deserves attention because excessively dry conditions can affect corks, while uncontrolled moisture can damage building materials and encourage mold growth.
Use a reliable thermometer and hygrometer to monitor the finished wine wall. Position monitoring equipment where it can provide a useful reading without being directly exposed to a cooling outlet. For larger or irregular enclosures, multiple monitoring points may reveal temperature differences between upper and lower storage areas.
Before loading the bottles, operate the completed enclosure and allow its temperature and humidity to stabilize. Confirm that the cooling equipment drains condensation correctly, that the door seals properly, and that the racks remain secure. If the system cannot maintain the intended conditions, address the insulation, air leakage, equipment capacity, or ventilation rather than simply lowering the thermostat.
7. Test, Organize, and Maintain Your Finished Wine Wall
The final stage is verifying that the installation performs as intended. A wine wall should be structurally secure, convenient to use, easy to inspect, and capable of maintaining suitable storage conditions if it is refrigerated.
Begin with a physical inspection of every rack section. Look for loose screws, uneven supports, damaged brackets, gaps between mounting panels, and movement when the system is loaded. Check that the wall finish has not cracked around fasteners and that the racks do not interfere with doors, electrical fixtures, or ventilation openings.
Load the collection according to the rack manufacturer’s instructions. Start with a representative selection rather than filling the entire wall immediately. Confirm that each bottle sits securely, that neighboring bottles do not press against one another, and that removing one bottle does not disturb adjacent positions.
For a refrigerated installation, monitor the room for several days before treating it as finished. Check temperature and relative humidity at different times, including periods when the door has been opened. Inspect glass panels, door seals, corners, and the area around the cooling equipment for condensation or unexpected moisture.
Create an inventory system
A well-organized wine wall should make it easy to find individual bottles. Start with a simple record of the producer, wine name, vintage, region, bottle format, and storage location. Digital spreadsheets or wine inventory applications can help maintain an accurate record as the collection changes.
Assign positions by rack row and column. For example, a bottle in row C, position 4 can be recorded as C4. If the display contains multiple sections, give each section a letter or number. This system becomes particularly useful when the collection reaches 100 bottles or more.
Consider separating bottles by drinking window. Wines intended for near-term consumption can occupy convenient positions, while bottles being held for future occasions can be placed in less accessible areas. Larger formats should have clearly designated spaces rather than being squeezed into openings designed for standard bottles. For additional planning, see how many glasses in a magnum to understand the serving capacity of larger-format wine bottles.
Follow a regular maintenance routine
Inspect open racks periodically for loose hardware, dust accumulation, and signs of wood movement. Clean decorative surfaces with materials compatible with their finish, avoiding excessive moisture around joints and mounting points. Check that bottle supports have not shifted and that the wall remains free from visible cracking or water damage.
For refrigerated wine walls, inspect door seals, cooling filters, drainage, and equipment ventilation according to the manufacturer’s maintenance schedule. Keep air intakes and exhaust paths clear. If the system develops unusual noise, persistent condensation, or inconsistent temperature readings, arrange an inspection rather than ignoring the change.
Also review the collection itself. Remove empty bottles, update inventory records, and check that bottles are stored in their intended positions. If the collection grows beyond the original design capacity, add another properly supported rack section instead of overcrowding the existing installation.
A successful wine wall should remain practical as well as attractive. Good planning, appropriate structural support, suitable materials, and consistent maintenance help protect both the display and the collection. For further wine storage and construction information, explore the Wine Q&A section.
Frequently Asked Questions
Can you build a wine wall on an ordinary drywall partition?
Yes, provided the finished installation transfers its weight to suitable structural supports rather than relying on unsupported drywall. A conventional drywall partition may need additional blocking or a reinforced mounting panel. A freestanding structural frame can also be considered when the existing partition cannot safely support the intended design.
Can a wine wall hold Champagne and sparkling wine bottles?
Yes, but the rack openings must accommodate their wider bodies and different bottle shapes. Champagne bottles also have substantial weight, so verify the manufacturer’s capacity for the intended bottle format. Dedicated wider compartments can prevent sparkling bottles from becoming difficult to remove.
Should a wine wall be built before or after installing new flooring?
For a permanent floor-to-ceiling installation, coordinate the flooring and rack dimensions during the initial design stage. Installing finished flooring before final rack measurements can simplify determining the correct bottom clearance. Heavy structural supports, however, should be planned and installed according to the building design rather than treated as decorative flooring details.
Can a wine wall be installed underneath a staircase?
Yes, an under-stair area can provide useful storage because it makes use of otherwise difficult space. The sloping ceiling requires custom rack dimensions and careful planning around head clearance. Check the staircase structure before drilling or modifying any framing, and make sure the space has suitable temperature conditions.
How much space should you leave between a wine wall and nearby furniture?
The required clearance depends on the bottle dimensions, rack projection, door swing, and how bottles are retrieved. Allow enough space to remove the longest bottle without striking nearby furniture or walls. For a refrigerated installation, also account for equipment access and the airflow clearances specified by the cooling manufacturer.
Building a wine wall successfully means combining secure construction, thoughtful bottle organization, and materials suited to the intended storage environment. An open decorative display can be a relatively straightforward home improvement, while a refrigerated glass-enclosed wine wall requires more detailed insulation, moisture control, and cooling design. Plan the structure around your collection and the conditions your wine needs, and the finished installation can serve as both a practical storage solution and a distinctive feature of your home.
More in Wine Basics
 Which Rose Is Best for Your Taste, Budget, and Food PairingsUpdated Nov 21, 2026
 Is Cheap Wine Bad? How to Find Bottles Worth DrinkingUpdated Nov 21, 2026
 What To Write On A Wine Gift Tag: Thoughtful Messages For Every OccasionUpdated Nov 21, 2026
 Which Wine Is Best For Weight Loss? Compare Lower-Calorie ChoicesUpdated Nov 21, 2026
 What Is The Best Wine For Mimosas? Choose Bubbly That Balances Orange JuiceUpdated Nov 20, 2026
 Which Prosecco Is Best for Your Taste and OccasionUpdated Nov 20, 2026