

We may earn a commission when you buy through links on this page, at no extra cost to you. Learn more.
How to convert a closet into a wine cellar starts with insulating the space, installing a continuous vapor barrier, sealing the door, and adding a properly sized wine cooling system. An ordinary reach-in or walk-in closet can become a practical storage space for a growing wine collection when its temperature and humidity remain stable. With thoughtful planning, suitable shelving, and protection from light and vibration, you can create a compact cellar without dedicating an entire room to wine storage.
A spare bedroom closet, hallway storage space, or unused walk-in closet may offer more potential than it first appears. The key is to treat the conversion as a small construction project rather than simply installing wine racks and a refrigerator. A successful cellar needs an insulated enclosure, moisture control, appropriate cooling, and storage arrangements that protect bottles over time. The following steps explain how to assess your closet, prepare the room, select equipment, and organize your finished wine collection.
1. Choose a Closet With the Right Location and Dimensions
The best closet for a wine cellar is an interior space with solid walls, limited exposure to sunlight, and access to an appropriate location for cooling equipment. A closet away from kitchens, laundry rooms, water heaters, and exterior heat sources generally requires less work to prepare.
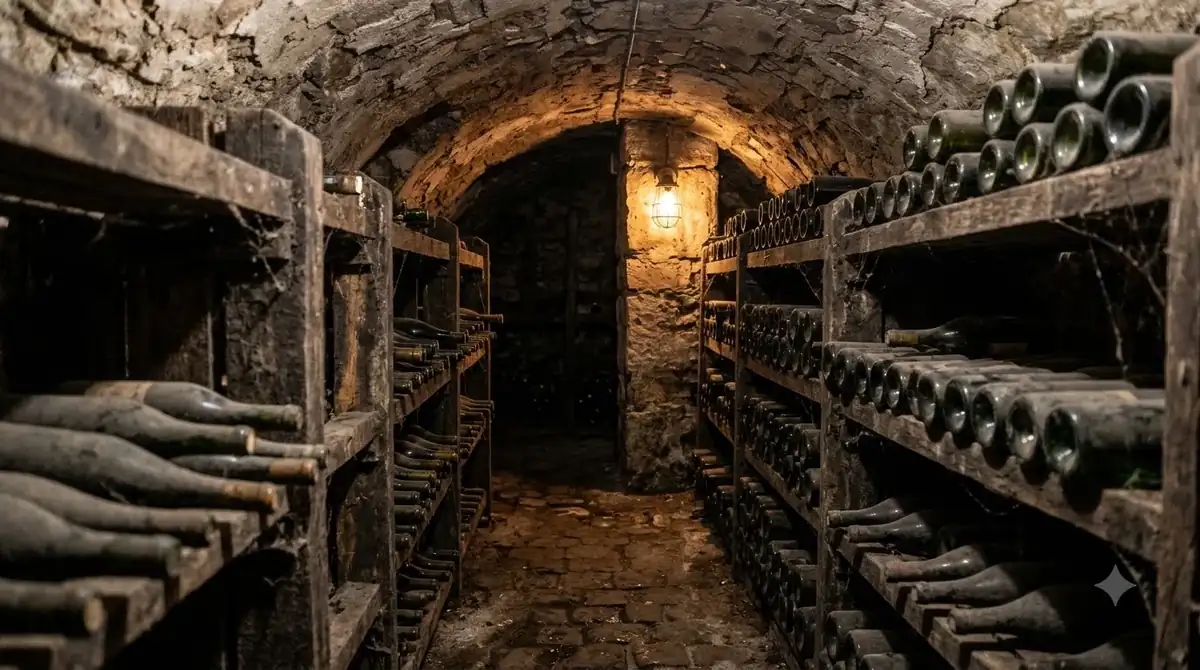
Start by examining the closet’s surroundings. A space surrounded by conditioned rooms is often easier to insulate than one sharing walls with a hot garage or an unconditioned attic. The temperature of adjoining rooms matters because the cooling system must remove heat entering through the closet’s walls, ceiling, floor, and door. A closet beside a kitchen may experience additional heat from cooking appliances, while one next to a laundry room may encounter changing temperatures and moisture.
Next, measure the available space. Record the interior width, depth, and height, then calculate the volume by multiplying those three measurements. For example, a closet measuring 3 feet wide, 3 feet deep, and 8 feet high contains 72 cubic feet. This figure provides a useful starting point when discussing cooling requirements with an HVAC professional.
Closet dimensions also determine how many bottles you can store. A narrow reach-in closet may accommodate a few rows of wall-mounted racks, while a walk-in closet can support multiple storage levels and a small central aisle. However, the number of bottles depends on bottle shapes, rack spacing, and how much room the cooling equipment occupies.
Wine Guardian’s closet conversion guidance estimates that a 3-by-3-foot reach-in closet can hold approximately 100 bottles with an appropriate racking arrangement. A larger 6-by-8-foot walk-in closet offers approximately 384 cubic feet of space and can accommodate several hundred bottles, depending on its design.
Check the walls and surrounding rooms
Inspect every wall, including the surfaces behind existing shelves. Look for water stains, peeling paint, cracks, musty odors, and signs of previous leaks. These problems should be addressed before construction begins. Covering existing moisture damage with insulation and wall panels can conceal a problem rather than solve it.
Pay particular attention to the ceiling and floor. A closet underneath an attic may experience considerable heat transfer through its ceiling. A closet above a damp concrete slab may require additional moisture protection. Also determine whether the proposed cooling equipment can discharge warm air into a suitable location.
If the closet has an exterior wall, a complicated ceiling, or limited access for equipment installation, request an assessment before purchasing materials. Structural modifications, electrical work, and cooling equipment placement may require professional assistance.
2. Establish the Ideal Temperature and Humidity
A converted wine cellar should generally maintain approximately 55°F, with relative humidity around 50% to 70%. These conditions provide a useful starting point for storing wines that you intend to keep for extended periods, although consistency is more important than chasing a particular number every hour.

Temperature control is particularly important because repeated temperature changes can affect wine as it ages. Excessive warmth can accelerate chemical reactions, while substantial fluctuations can cause the liquid and air inside a bottle to expand and contract. For wines sealed with natural cork, repeated changes may also affect the seal and increase the risk of unwanted oxygen exposure.
A regular household closet generally follows the temperature of the surrounding home. During summer, the space may become considerably warmer than the preferred storage range. In winter, heating systems can create another set of fluctuations. Simply placing bottles in a dark closet does not solve these problems.
Humidity is another important consideration. If the air is consistently too dry, natural corks may become vulnerable to drying over extended storage periods. Excessive humidity, on the other hand, can encourage mold growth and damage labels, packaging, and wooden fixtures. Maintaining a moderate, stable range is a sensible objective.
Install a digital thermometer and hygrometer inside the closet. Ideally, position the monitoring device near the middle of the storage area, around the height of the bottles. Avoid placing it directly beside the cooling outlet because the resulting reading may not represent the conditions throughout the room.
Temperature and humidity targets
The following figures provide practical reference points for planning a wine cellar. The exact readings may vary slightly with equipment, room construction, and the surrounding climate.
| Storage factor | Recommended target | What to monitor |
|---|---|---|
| Wine storage temperature | 55°F | Long-term temperature stability |
| Acceptable general range | 50°F–60°F | Temperature fluctuations |
| Relative humidity | 50%–70% | Moisture and condensation |
| Lighting | Minimal exposure | UV and direct sunlight |
| Vibration | Minimal exposure | Nearby appliances and equipment |
These targets should guide the construction and equipment selection process. A wine cellar is not necessarily successful because its thermometer briefly displays 55°F. It needs to maintain reasonably consistent conditions throughout the day and across changing seasons.
Tip: Record temperature and humidity readings at least twice daily during the initial setup period. Compare morning and afternoon measurements to identify fluctuations before filling the closet with wine bottles.
3. Insulate the Walls, Ceiling, and Floor
Insulation is one of the most important parts of a closet wine cellar because it slows heat transfer between the storage area and the surrounding house. Without adequate insulation, even a capable cooling system may struggle to maintain the desired temperature.
Begin by removing existing shelves, hanging rods, and unnecessary wall coverings. If the project involves opening the walls, inspect the framing and check for moisture damage before adding insulation. The objective is to create a continuous insulated enclosure rather than treating individual walls as separate projects.
For interior walls, IWA Wine Accessories recommends insulation in the R-13 to R-19 range, depending on the construction. Walls and ceilings facing unconditioned spaces may require R-30 insulation. Wine Guardian also recommends R-19 walls and an R-30 ceiling in its typical closet conversion guidance.
R-value describes a material’s resistance to heat transfer. Higher values generally indicate better insulating performance for a given thickness. Fiberglass batts, rigid foam boards, and closed-cell spray foam are common materials used in cellar construction.
Compare common insulation materials
Fiberglass batts are familiar to many contractors and can fit between conventional wall studs. They are a practical option, but installation quality matters. Gaps, compression, and poorly fitted sections reduce the effectiveness of the insulated enclosure. Fiberglass also requires an appropriate vapor-control strategy.
Rigid foam boards offer another option. They can be installed between framing members or as a continuous layer, depending on the wall assembly. Their performance depends on thickness, product specifications, and careful treatment of joints.
Closed-cell spray foam can provide insulation and significant resistance to water vapor. Because it expands into cavities, it can help reduce gaps around framing and difficult corners. However, installation should be handled by qualified professionals who understand the requirements of the particular building assembly.
Do not overlook the ceiling. An insulated wall system will not perform as intended if warm air enters freely through an uninsulated ceiling beneath an attic. The floor also deserves attention, especially when the closet is above a garage, crawlspace, or moisture-prone concrete surface.
Once the insulation is installed, the enclosure should be inspected for incomplete sections, compressed materials, and openings around electrical boxes and pipes. These details influence the cooling load and can determine whether the finished cellar maintains its target temperature.
4. Install a Continuous Vapor Barrier and Control Moisture
A vapor barrier helps prevent warm, moisture-laden air from entering the colder wine cellar wall assembly. This is particularly important in refrigerated closets because temperature differences can cause moisture to condense inside improperly constructed walls.
A commonly used material is 6-mil polyethylene sheeting. IWA Wine Accessories recommends installing the barrier on the warm side of the insulation, with the precise placement determined by the building assembly and local climate. This placement helps prevent moisture from migrating into colder parts of the enclosure. Its wine cellar installation preparation guide also explains insulation requirements, vapor-barrier materials, and the importance of sealing the enclosure.
Install the material continuously across the required wall and ceiling surfaces. Overlap adjacent sheets by at least 6 inches, following IWA’s installation guidance, and seal the seams with suitable vapor-barrier tape. Openings around wiring, pipes, outlets, and other penetrations also need attention.
Do not assume that a few pieces of plastic stapled to the wall will provide adequate protection. The barrier needs to function as a continuous system. A small unsealed opening can allow humid air to enter the wall cavity, where condensation may accumulate over time.
Pay attention to existing floors
Closet floors are frequently overlooked during wine cellar conversions. Carpet is generally a poor choice because it can retain moisture, complicate cleaning, and create problems if condensation or a small leak occurs.
Tile, sealed concrete, and suitable moisture-resistant flooring are more practical options. If the closet has a concrete floor, inspect it for cracks and signs of moisture penetration. This Old House explains that concrete can allow moisture to pass through and recommends sealing appropriate basement surfaces before installing finished flooring.
Where a concrete floor has an unresolved moisture problem, address the source before covering it. A surface coating cannot reliably solve water entering through foundation cracks or persistent drainage problems.
Also consider the flooring transition at the doorway. The finished floor should not interfere with the door seal or create an opening through which conditioned air can escape.
Prevent condensation and mold
Moisture problems can affect both the building and the wine collection. Condensation on cold surfaces, damp wall cavities, and poorly ventilated equipment spaces may encourage mold growth. A cellar should therefore be inspected for leaks and condensation throughout the installation process.
If the surrounding home is humid, sealing the cellar becomes particularly important. However, do not confuse a vapor barrier with a complete moisture-management system. Proper insulation, drainage, equipment installation, and building ventilation must work together.
5. Choose a Wine Cooling System and Seal the Door
A dedicated wine cooling system is generally the most reliable choice for a refrigerated closet cellar. Unlike ordinary household air conditioners, wine cellar systems are designed for wine storage applications and can be selected according to the room’s cooling requirements.
The first decision is where the system will send the heat it removes from the closet. A cooling unit does not make heat disappear. It transfers heat from the wine cellar into another location, so the installation needs an appropriate exhaust arrangement.
Through-the-wall cooling systems
A through-the-wall system is often suitable for an interior closet that shares a wall with another room. The equipment is installed through the wall, allowing it to remove heat from the cellar and release that heat into the adjoining space.
This arrangement can be relatively straightforward because it avoids installing extensive ductwork. However, the adjoining room must have enough ventilation and suitable environmental conditions to handle the discharged heat.
For example, a utility room or suitably ventilated hallway may be more appropriate than a small bedroom that is already warm. The equipment manufacturer will specify installation clearances and operating requirements.
Ductless split cooling systems
A ductless split system separates the cellar-side cooling equipment from an outdoor or remote condenser. This configuration can work well when the closet does not have a suitable adjoining room for heat exhaust.
Split systems generally require more installation planning. The location of the condenser, refrigerant lines, electrical supply, and condensate management must all be considered. A qualified HVAC contractor should determine whether the system is appropriate for the property.
Size the equipment correctly
Do not select cooling equipment simply by counting bottles or measuring the floor area. Cooling requirements depend on the total room volume, insulation quality, door construction, glass surfaces, adjoining temperatures, and the amount of heat entering the cellar.
A small closet with excellent insulation may have a different cooling requirement from a similarly sized closet with an uninsulated ceiling and a large glass door. An undersized system may run continuously without reaching its target temperature, while an unsuitable oversized system can create inconsistent operating cycles.
Ask the equipment supplier or HVAC professional to calculate the cooling load using the actual construction details. Also confirm whether the installation requires a condensate drain, condensate pump, or dedicated electrical circuit.
Replace or upgrade the closet door
The door is a major part of the insulated enclosure. Standard hollow-core interior doors generally provide inadequate insulation and may allow conditioned air to escape around the frame.
Consider an insulated exterior-grade door with weatherstripping around the perimeter and a properly fitted bottom sweep. The door should close securely without gaps along the top, sides, or floor.
If you prefer a glass door, select an appropriately insulated, sealed double-pane design. Glass can increase heat transfer, so large glass panels may require additional cooling capacity. Single-pane decorative glass is generally unsuitable for a temperature-controlled cellar.
Before completing the installation, test the door closure and inspect its seals. Even a well-insulated closet can struggle to maintain temperature if warm air continually enters through the doorway.
6. Install Wine Racks, Lighting, and Storage Accessories
Once the insulated enclosure and cooling system are ready, plan the interior around the bottles you intend to store. Properly designed wine racks make the space easier to use while keeping bottles secure and organized.
Start by deciding how many bottles you need to accommodate. If you primarily collect standard 750 ml bottles, conventional individual-bottle racks may provide an efficient layout. However, Champagne bottles, Burgundy bottles, magnums, and other larger formats may require wider or adjustable storage sections.
Measure the available wall space after accounting for insulation, wall finishes, cooling equipment, and door clearance. Avoid designing racks that block the cooling outlet or prevent air from circulating through the room.
Choose suitable wine racks
Wooden racks are a traditional choice for residential cellars. They can create a warm appearance and offer individual bottle storage. Choose materials and finishes appropriate for a space with controlled humidity, and ensure that the racks are securely anchored.
Metal wine racks offer another option, particularly when floor space is limited. Their relatively open construction can make bottle identification easier, although the installation must be designed to support the collection safely.
For a small closet, wall-mounted racks can use vertical space effectively. In a walk-in closet, floor-to-ceiling shelving may provide greater capacity, provided there is enough room to access bottles without disturbing the surrounding racks.
Store cork-sealed bottles horizontally when the bottle design allows it. This position keeps the wine in contact with the cork and is a practical arrangement for long-term storage. Bottles with alternative closures may have different storage requirements.
Plan the lighting carefully
Wine benefits from protection against excessive light, especially direct sunlight and ultraviolet exposure. A closet cellar should therefore use low-heat lighting and avoid unnecessary illumination.
LED fixtures are a practical option because they generally produce less heat than many conventional lighting alternatives. Install them away from the cooling system’s air intake and outlet, and use a switch or motion sensor so that lights are not left on unnecessarily.
Avoid installing bright fixtures directly above bottle labels or near exposed glass surfaces. If the closet has a glass door, consider how sunlight from nearby windows may enter the storage area throughout the day.
Include monitoring and organization tools
A digital temperature and humidity monitor should be part of the finished cellar. Some devices offer remote monitoring, historical readings, and alerts when conditions move outside a selected range.
Labels, rack markers, and a digital inventory can also make the collection easier to manage. Record the wine’s producer, region, grape variety, vintage, bottle quantity, and preferred drinking window where known.
For additional organization ideas, see our guide on how to organize a wine cellar. A clear storage plan helps prevent unnecessary bottle handling and makes it easier to locate specific wines.
7. Test the Finished Cellar and Maintain Its Conditions
Do not fill the closet with wine immediately after construction. Run the cooling equipment, monitor temperature and humidity, and verify that the room can maintain stable conditions before introducing bottles.
Begin with a thorough inspection. Confirm that the insulation is continuous, vapor-barrier seams are sealed, the door closes tightly, and the cooling system has the required clearances. Make sure electrical connections and condensate arrangements meet the equipment manufacturer’s instructions.
Switch on the cooling system and allow the empty cellar to reach its intended storage temperature. Then monitor readings at bottle level over several days. Pay attention to changes between morning and afternoon and to how the equipment performs during warmer periods.
A temperature reading taken directly beside the cooling outlet may not represent the rest of the closet. A separate remote thermometer placed near the middle of the racks can provide a more useful picture of actual storage conditions.
Check the cellar after the first week
After the initial operating period, review the temperature and humidity records. If the room cannot maintain its target conditions, investigate the cause before stocking it.
Start with the simplest possibilities: an improperly sealed door, an open wall penetration, a cooling outlet obstructed by shelving, or inadequate exhaust ventilation. Also check whether the room next to a through-the-wall unit is becoming excessively warm.
Persistent condensation, unusually long cooling cycles, or substantial temperature changes may indicate an installation or construction problem. A qualified technician can inspect the equipment and determine whether the cooling capacity matches the room’s actual heat load.
Establish a simple maintenance routine
Once the cellar is operating properly, keep the space clean and inspect it regularly. Dust the cooling system’s accessible filters and vents according to the manufacturer’s maintenance schedule. Check door seals for deterioration and look for moisture around the floor and wall corners.
Review temperature and humidity readings regularly, particularly when outdoor conditions change. A system that operates comfortably during mild weather may experience a greater workload during a hot summer.
Keep cleaning products, paint, chemicals, and strongly scented materials outside the wine storage area. Avoid storing unrelated household equipment in the cellar, especially items that generate heat or vibration.
For a broader understanding of the planning process, including space requirements and construction choices, explore our guide on how to make a wine cellar in a closet. If you are still deciding whether a full conversion is practical, our article about how much a wine cellar costs can help you evaluate the different project components.
Frequently Asked Questions
Can I convert a closet into a wine cellar without professional help?
Basic measuring, rack assembly, and inventory planning are reasonable DIY tasks. However, cutting walls, installing new electrical circuits, modifying structural framing, and handling refrigeration equipment may require licensed professionals. Local building regulations can also determine whether permits or inspections are necessary.
Can I store opened wine bottles in my converted wine closet?
Yes, but opened wine should generally be resealed and refrigerated rather than left in the cellar at approximately 55°F. Most opened still wines retain their best quality for around 3 to 5 days in the refrigerator, while sparkling wines generally last about 1 to 3 days with an appropriate sparkling-wine stopper.
Should wine bottles be stored horizontally or vertically?
Horizontal storage is a traditional choice for bottles sealed with natural cork because it keeps the wine in contact with the closure. Bottles with screw caps and other alternative closures do not require the same cork-moisture consideration. Storage orientation can also depend on bottle design and the manufacturer’s recommendations.
Does every wine in a cellar need to be stored at the same temperature?
Most wines intended for long-term storage can share a cellar maintained near 55°F. Serving temperatures are different from storage temperatures: sparkling wines are generally served around 40°F to 50°F, light whites around 45°F to 50°F, and full-bodied reds around 60°F to 65°F. Individual bottles can be brought to their preferred serving temperatures before opening.
Can I store wine in a closet without installing a cooling unit?
Yes, if the closet naturally maintains consistently suitable temperatures and humidity throughout the year. A naturally cool interior basement closet may work better than a bedroom closet exposed to heating and cooling cycles. Monitor actual conditions over several weeks and through seasonal changes before relying on the space for long-term storage.
Converting a closet into a wine cellar is a practical way to create dedicated storage without remodeling an entire room. Focus first on insulation, vapor protection, door sealing, and properly sized cooling equipment, then complete the space with secure racks and reliable monitoring. With a carefully constructed enclosure and regular maintenance, even a modest closet can provide a stable home for a growing wine collection.
More in Wine Basics
 What Is The Best Wine For Mimosas? Choose Bubbly That Balances Orange JuiceUpdated Nov 20, 2026
 Which Prosecco Is Best for Your Taste and OccasionUpdated Nov 20, 2026
 Which Wine Is Best For Health? Understand the Risks and BenefitsUpdated Nov 20, 2026
 Which Champagne Is Best for Your Taste and OccasionUpdated Nov 20, 2026
 What To Put In A Wine Gift Basket For A Thoughtful, Memorable GiftUpdated Nov 20, 2026
 What Is the Best Wine for Mulled Wine? Choose a Smooth, Fruity RedUpdated Nov 20, 2026